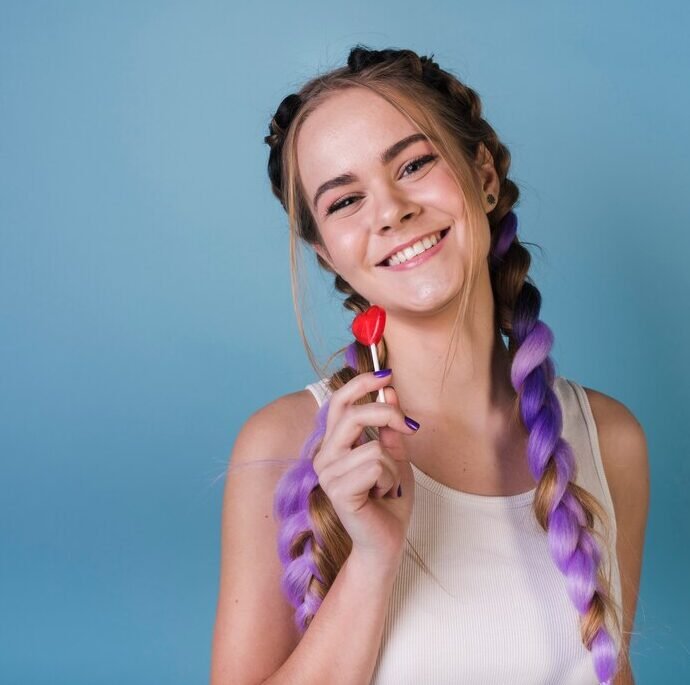
5 Chic & Easy Braided Hairstyles: Perfect for Any Occasion

Braided hairstyles around the world, especially in African cultures have been an elegant favorite for centuries because of their simplicity, beauty and endless versatility. Whether it’s the normal three-strand braid or an intricate Dutch braid, these hairstyles add a touch of elegance and charm to perfect any look. Their adaptability makes them great for casual and formal settings—whether you’re heading out for a date night with someone special, a relaxed day with friends, a professional meeting at your office, or a special event, there are many braided hairstyles to suit every occasion.
Here, we’ll share 5 easy yet stylish braided hairstyles along with some helpful tips for beginners to master in no time. You will also find helpful ways to fix messy braided hairstyles, using just the right product in your hair. These braided hairstyles are not only quick to create but also leave a glam and effortlessly chic look, no matter what’s the event. Get ready to elevate your look with these stunning braided hairstyles!

Tips For Beginners When Trying Braided Hairstyles

- Make sure your hair is detangled. Using a wide-tooth comb or brush will help remove any knots. This will make it much easier to section your hair and keep the braids neat. Get the right detangling comb for yourself now: Tangle Teezer Ultimate Detangler, Felicia Leatherwood Detangler Brush, Rizos Curls Pink Detangling Flexi Brush, Drybar Super Lemon Drop Detangling Brush and Briogeo Wide Tooth Detangling Comb.
- Section your hair evenly. Such as, a classic three-strand braid will require you to divide your hair into three equal parts. This will help achieve smoother, more balanced braids.
- If you’re braiding your own hair, especially the back, use two mirrors or a hand-held mirror to see what you’re doing. This will help ensure that your sections are even and your braid stays neat.
- Practicing basic braids like the three-strand braid or a French braid will build your confidence before trying more complex styles. Once you master these, it’ll be easier to try braided hairstyles like fishtails, Dutch braids or waterfall braids.
- When braiding, try not to hold the sections too tightly, as this can make the braid look stiff and make you feel uncomfortable. A relaxed grip will allow the braid to fall naturally, giving it a softer look.
- Keeping extra hair ties, bobby pins, and clips on hand can help you part the sections of your hair out of the way while braiding. These tools are especially handy when working with longer or thicker hair.
- Braided hairstyles need practice, so don’t get discouraged if they doesn’t come out perfectly on your first few attempts. Start with small sections and simple styles, and gradually work your way up to more complex ones. It’s all about building muscle memory and developing a feel for the technique.
With these tips, you’ll be on your way to creating beautiful braided hairstyles with ease. Happy braiding!
1. Dutch Braid (Inside-Out Braid)
Dutch braid, famously known as the inside-out or reverse braid, is an elegant three-strand braid that stands out from the head, creating a raised effect. In a Dutch braid, the strands are crossed under, giving it a more pronounced and volumized look, perfect for adding dimension to your hairstyle. It is best for:
- Casual Outings like brunches, casual meet-ups, or running errands, giving a chic and effortless look.
- Sports and Active Days: Since it keeps the hair tightly in place, it’s great for active days or sports activities, like going to the gym or hiking.
- Formal Events: With a little extra care, the Dutch braid can be styled into elegant updos or side braids, making it suitable for formal events like weddings, cocktail parties, or date nights.
Its stylish and secure nature makes the Dutch braid a go-to choice for any event, whether you’re aiming for a laid-back or a polished, sophisticated look.

Instructions on Creating an Inside-Out Braid:
- Take a small section of hair from the crown of your head and divide into three equal parts.
- Begin by taking the right strand and crossing it under the middle strand, then take the left strand and cross it under the new middle strand.
- Continue this pattern, but each time you cross a strand under, add a small section of hair from the side into the strand before crossing it under the middle.
- Keep braiding, adding more hair each time until you reach the nape of your neck. From there, continue a simple three-strand braid using the same under-cross technique until you reach the end of your hair.
- Tie the braid off with a small elastic band, and gently tug at the sides of the braid to make it look fuller and more voluminous. You can add hair accessories for an added glam and style!

2. Crown Braid
A stunning updo that wraps around the head like a crown, giving a regal, stylish appearance. It’s perfect for keeping hair off your face while adding an intricate look. This braided hairstyle works for both casual and formal occasions, making it a perfect choice for many hair enthusiasts. It is ideal for:
- Formal Events: Weddings, proms, and galas, where you want a sophisticated, timeless hairstyle.
- Outdoor Parties: Perfect for garden parties, outdoor festivals, and casual summer events, as it keeps your hair neatly in place.
- Boho or Vintage-Themed Events: The crown braid complements bohemian and vintage-inspired outfits beautifully.
- Work or Casual Outings: It’s a practical yet stylish option to elevate a simple outfit for a polished day look.
The crown braid’s elegance and versatility make it suitable for both glamorous and relaxed events.

Instructions on Creating a Crown Braid:
- Start with clean, detangled hair. If your hair is slippery, adding some texturizing spray or dry shampoo can help with grip.
- Part your hair to one side, then divide it into two equal sections for the braid.
- Start at one ear and create a Dutch braid (the one explained just above) or a French braid, working around the perimeter of your head. Continue braiding along your hairline.
- Keep adding small sections of hair to the braid as you go, braiding all the way around until you reach the opposite ear.
- Once you run out of hair to add, continue braiding the remaining length of your hair into a regular three-strand braid. Secure the end with a small rubber band or hair tie.
- Wrap the remaining braid around your head, tucking the end underneath the start of the braid. Use bobby pins to secure the braid in place, making sure the pins are hidden.
- Gently pull on sections of the braid to make it appear fuller, and finish with a light mist of hairspray for hold.

3. Messy Side Braid
A messy side braid is an easy-to-go yet stylish braided hairstyle that sits over one shoulder, with its loose, textured strands giving an effortless vibe. It is the perfect option for days when you want a chic look without too much fuss, making it ideal for casual outings and more laid-back events.
The messy side braided hairstyle is perfect for informal gatherings such as going on a brunch with friends, picnics, or a casual day at the pool side or the beach. It’s also great for date nights, festivals, or even as a laid-back yet stylish look for a casual wedding or an outdoor party. Its effortless charm makes it versatile for many relaxed settings.

Instructions for Creating a Messy Side Braid:
- Slightly curl your hair or use a texturizing spray to add some volume and grip, which will help achieve the messy look. Get just the right texturizing sprays here: r+co balloon dry volume spray, Verb Volume Dry Texture Spray, Drybar Triple Sec 3-in-1 Finishing Spray, IGK Beach Club Texture Spray and OUAI Wave Spray.
- Gather all your hair over one shoulder and divide into three equal parts.
- Begin with a loose three-strand braid, keeping the tension light to create a relaxed appearance. Braid down to the ends and secure with a hair tie.
- To loosen the braid, gently tug on the braid’s sides and create a more voluminous, messy texture. Pull out a few face-framing pieces for an extra casual feel.
- Use a light mist of hair spray to keep the braid in place while maintaining the soft, messy look. Get the perfect hair mist here to keep your hairstyle in place!

4. Bubble Braids
Bubble braids come with a fun and stylish twist on the traditional braids, featuring a series of evenly spaced “bubbles” or sections down the length of a ponytail. They create a voluminous and playful look that’s really eye-catching and easy to achieve. This type of braided hairstyle is perfect for adding a trendy touch to your hairstyle while keeping things simple and chic.
Bubble braids can be adapted for a variety of occasions:
- Casual Outings: Perfect for days out with friends, brunch, or running errands, as they give a playful and trendy look without much effort.
- Festivals and Concerts: They add a fun and youthful vibe that fits well with the energetic atmosphere of music festivals or outdoor events.
- Sporty Activities: Bubble braids keep hair out of your face, making them ideal for gym sessions, hikes, or any physical activity where you want a stylish yet practical hairstyle.
- Casual Parties or Picnics: Their stylish yet relaxed look makes bubble braids great for informal gatherings, barbecues, or picnics.
This hairstyle is a great way to switch things up while maintaining a fresh and modern look that’s suitable for various settings!

Instructions on Creating Bubble Braids:
- Brush your hair back and secure it into a high or low ponytail using a hair tie. Make sure it’s smooth for a sleek look or keep it a bit looser for a more casual style.
- Take another hair tie and wrap it around the ponytail a few inches below the first one. Adjust the distance between each hair tie according to how big you want each bubble to be.
- Gently pull and loosen the hair between each set of hair ties to create a rounded, bubble-like shape. Repeat this for every section down the length of your ponytail.
- Keep adding hair ties and creating bubbles until you reach the end of your ponytail. Adjust the size of the bubbles as needed to ensure they’re even.
- Use a light hold hairspray to keep everything in place, especially if you have fine or slippery hair. Get the best hair holding sprays here: Schwarzkopf Freeze Blasting Spray, TreSemme Two Extra Hold Hair Spray, Kenra 13 Perfect Medium Spray, Kristin Ess Ultra Fine Workable Hairspray and Bondi Boost Flex and Shine Hairspray.

5. Dutch Braid Low Ponytail
This braided hairstyle combines the sleek, intricate design of a Dutch braid with the simplicity of a low easy-to-go ponytail. The Dutch braid, similar to a reversed French braid, creates a beautiful raised effect that adds depth and texture. This style is perfect for keeping hair neatly in place while still looking elegant.
This braided hairstyle is versatile and can be tried for both casual and semi-formal events. It’s perfect for:
- Work or Business Meetings: This adds a polished touch as the low ponytail keeps it professional.
- Brunch or Casual Outings: It gives a chic yet relaxed vibe that pairs well with casual outfits.
- Weddings or Parties: With a bit of accessorizing, like adding a decorative hair clip or floral pin, this style can easily be dressed up for a more formal occasion.
- Gym or Sports Activities: It keeps your hair secure and off your face, making it great for active settings too.
The Dutch braid low ponytail is ideal for adding a touch of style to any look while keeping hair neat and in place.

Instructions on Creating a Dutch Braid Low Ponytail:
- Start with tangle-free hair. You can add a bit of smoothing serum or lightweight styling cream to minimize frizz. Try these best-rated hair smoothing serums: Livon Anti Frizz Serum For All Hair Types, Paul Mitchell Smoothing Super Skinny Serum, Biolage Smooth Proof Serum For Frizzy Hair, Olaplex Bonding Oil and Living Proof Dry Conditioning Spray for Frizzy Hair.
- Take a section from the top of your head, near your hairline, and divide it into three equal strands.
- Cross the right strand under the middle strand, then the left strand under the new middle strand, adding small sections of hair each time you cross the strands under. This will create the signature raised braid effect.
- Keep braiding down the center of your head, following your hairline toward the nape of your neck, until you reach the point where you want the ponytail to sit.
- Use a hair tie to secure the braid at the nape, then gather the rest of your hair into a low ponytail and secure it with another hair tie.
- For a polished look, wrap a small strand of hair around the hair tie to conceal it, securing it with a bobby pin. Finish with a light mist of hairspray for hold.

Braided hairstyles have always been every girl’s favorite as they offer a perfect blend of versatility and style, making them suitable for every occasion, whether it’s a casual day out with friends and family or a formal event. With their timeless charm, these braided hairstyles and cute hair accessories can effortlessly elevate your look, adding a touch of elegance or a playful twist to your hairstyle routine.
So, hop on and experiment with these braided hairstyles and find the ones that best suit your vibe and look of the day. Whether you’re getting ready for a laid-back brunch or a special celebration, there’s a braided look for you.
We’d love to hear about your experience with braided hairstyles in the comments below! Share your favorite braided looks or let us know which of the featured styles you tried. Happy braiding!


